Import Assets
Importing an asset downloads any missing files (first time) then links or creates the corresponding Blender data so you can place, assign, or edit it immediately.
-
Object
Mesh / multi-object content: imports linked objects into the active collection.
Steps -
Texture / Material
Builds a material, assigns to selected objects, mutes missing maps gracefully.
Steps -
Height Map
Creates displaced plane with node network ready for sculpting or shading.
Steps -
VDB
Imports OpenVDB volumes and configures them for rendering.
Steps -
Troubleshoot
Slow downloads, missing textures, or update conflicts.
Fixes
At a Glance
| Type | Trigger | Creates / Updates | Placement Behavior | Notes |
|---|---|---|---|---|
| Object | Import button | Links objects / collections | Preview + click to place; Shift=multi-place; Ctrl=scatter | Downloads missing data first |
| Material | Import button | New material or updates existing node group | Assigns to hovered object or selected objects | Missing maps muted |
| Height Map | Import button | Plane + displacement node setup | Click to place plane (or 3D cursor) | High-res meshes can be heavy |
| VDB | Import button | Volume object(s) configured for rendering | Click to place volume origin | Large caches can take time to unpack |
- Use Object for geometry you want to place multiple times.
- Use Material to standardize look across selected objects.
- Use Height Map for terrain prototyping or displacement-based workflows.
- Use VDB for volumetric effects like smoke, clouds, explosions, or fog.
Caching & re-use
Already downloaded assets are validated via checksum; re-import is near instantly unless you switched version/quality.
Requirements
Asset owned.
Signed in for first download or if not cached.
Internet if asset not installed locally.
Choose Version & Quality (optional)
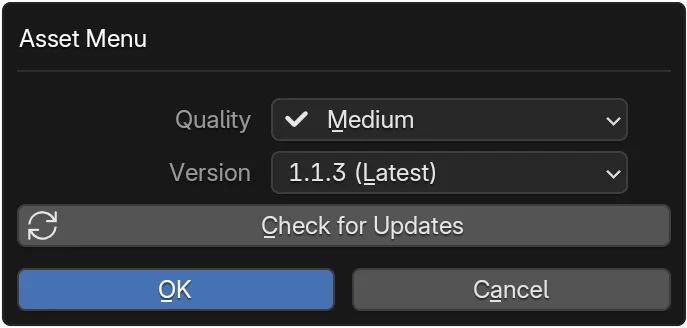
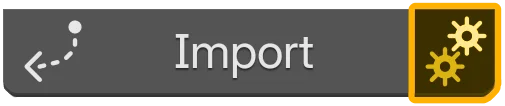
- Click the gear icon on the owned asset card.
- The dialog lists available Quality and Version options.
- Select the desired version and quality.
- (Optional) Click the
Check for Updatesbutton to refresh available builds. - Confirm to save the selection.
Import Steps
The common import flows are grouped below — pick the tab for the asset type you're working with (or jump via the cards above).
- Click
Importon the owned asset card. - Sign in if prompted or allow the add-on to fetch identifiers.
- If the asset isn't cached it downloads while you choose placement.
- Move the mouse to preview placement, then click to place. Objects link into the active collection.
Placement Controls
- LMB: Place at the previewed location.
- While downloading: Click to lock placement. The asset will place automatically once the download completes.
Extended actions use modifier keys:
Multi-place — Shift + LMB
Keep clicking to place additional copies. Press Esc or Right Mouse to finish multi-placement.
Scatter — Ctrl + LMB over a mesh
Adds a FASTscatter Geometry Nodes modifier to the hovered mesh that instances the imported object. Ctrl overrides Shift if both are held.
- Select the target objects in Blender.
- Click
Importon the material asset. - Hover a mesh and click to apply directly to that object; otherwise the material is assigned to the currently selected objects.
- Texture nodes are filled where files exist; missing maps are muted.
Material slot behavior
Materials do not overwrite existing ones. They are inserted into new slots at the bottom of the material stack.
- Click
Import. - Move the mouse to choose placement, then click to place the terrain. A plane with a displacement setup is created for easy editing.
- Click
Import. - If not cached, the VDB archive downloads, then unpacks.
- Click in the viewport to place the volume origin. Adjust domain/object settings as needed.
VDB notes
- VDB file sizes vary widely; initial unpack may take longer than textures.
- Thumbnails and icons identify VDB assets in the browser and details pages.
- If no VDB objects are found in the downloaded file, an error is reported.
Progress & Cancellation
Download UI
The asset card now shows two distinct stages when needed: Downloading and Unpacking. If the bars complete quickly, the asset was already cached.
- Progress bars show for Download and Unpack stages.
- Cancel button (X icon) or ESC stops download; import ends.
- On cancellation, partial files are cleaned up; cache remains consistent.
Background download
Prefer to pre-cache heavy assets without placing them? Use Background Download from the product details page or hold Alt while clicking Import. You can monitor progress in Preferences > Advanced.
After Import
- You can re-import with different version/quality by changing settings then repeating.
- Re-importing an Object duplicates linked object instances; delete unwanted copies manually.
- Re-importing a Material updates the node tree (if structure unchanged) else creates a new suffixed material.
- Height Map re-import spawns a fresh plane; consider using Collections to organize iterations.
- VDB re-import places a new volume object using the currently selected version/quality.
Troubleshooting
Slow download
- Check other network usage; large textures or height maps can be >100MB.
- Try importing a smaller asset to test baseline speed.
- See Offline & Caching for cache location.
Missing textures after import
- Ensure all maps finished downloading (progress reached 100%).
- Click import again (cached files will validate quickly).
- Paths still broken? Restart Blender to rebuild search paths.
Version mismatch
- If objects look wrong after switching version, re-open the Version & Quality dialog and confirm the intended build.
- Clear local cache for that asset (if feature available) then re-import.
Material node differences
Some older asset versions may use legacy node groups; updating quality can migrate nodes. Always test in a duplicate file when upgrading large scenes.